
3. Verificatie
De werking van de FlexiObox controleren
Na de voorbereiding en configuratie is het heel belangrijk dat de installateur de volledige installatie controleert.
Dit kan gedaan worden met de nieuwe 'Device Info page' die je kan vinden onder het tabblad 'IO Diagnostics'.
Om FlexiO correct te laten werken, moet elk tabblad op de apparaatinformatiepagina (vergelijkbaar met I/O Diagnostics ✅ ) worden ingevuld voordat de installatie wordt afgemeld.
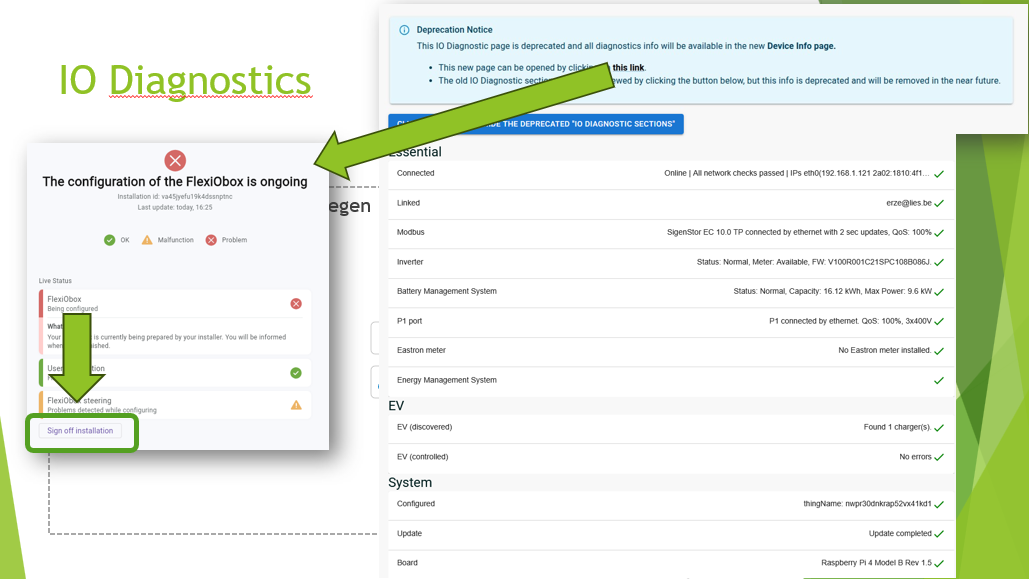
In deze overgangsfase worden zowel de 'apparaatinformatiepagina' als de IO Diagnostics getoond. We zullen nieuwe controles blijven toevoegen op de apparaatinformatiepagina om de installatie 100% 'first time right' te maken.
Uit te voeren controles
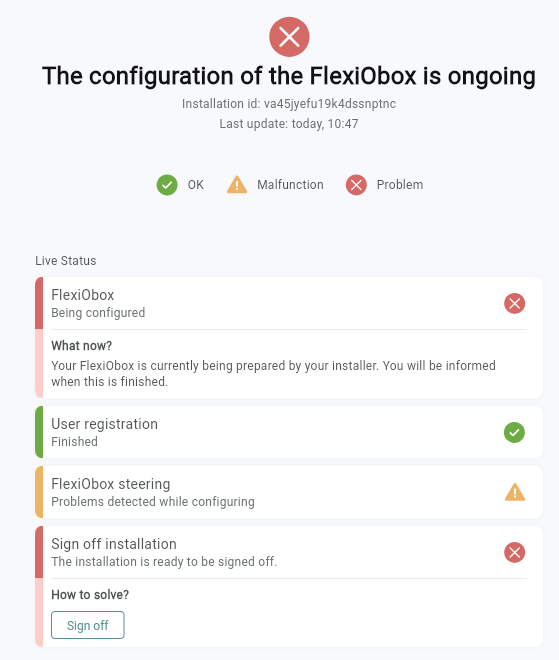
je kan op elk tabblad van de 'apparaatinformatiepagina' klikken om de details te zien. De gebruiker kan een samengestelde weergave van deze tabbladen zien. Door in te loggen met je partneraccount je kan de details controleren en aan het einde van de configuratie afmelden.
Check 1: Aangesloten
Uit te voeren controle | Indien niet ok |
|---|---|
Als de FlexiOBox verbonden is met internet en verbinding kan maken met de LIFEPOWR Cloud, is deze parameter beschikbaar ✅ .  Voorbeeld Belangrijk: Op de FlexiOboxmoet de groene LED ook continu branden en moet het verbindingspictogram actief zijn op de webpagina van deze FlexiObox: 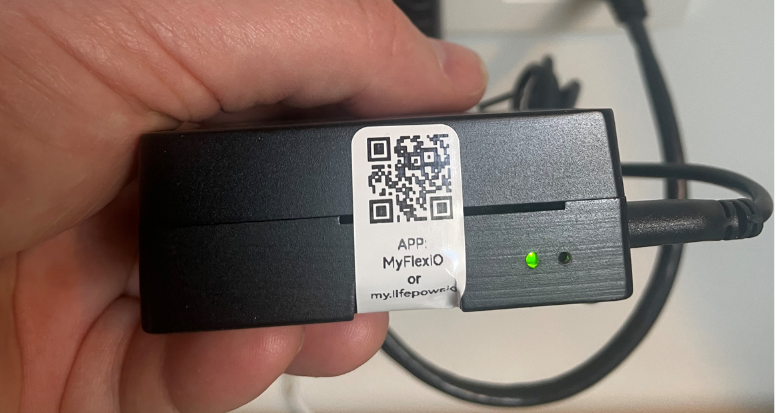 Groene LED 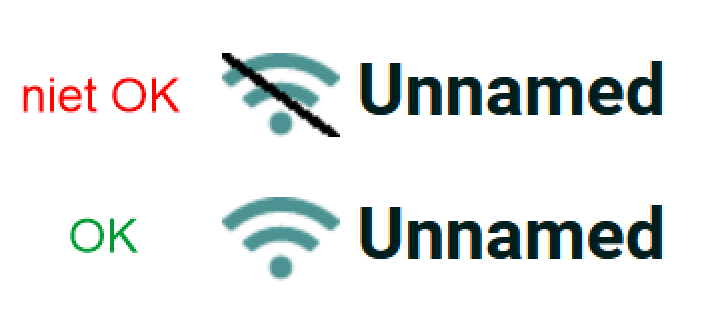 Verbindingssymbool |
Gedetailleerde netwerkondersteuning vind je hier. |
Controle 2: Modbus
Uit te voeren controle | Indien niet ok |
|---|---|
Voor een Modbus TCP-regelaar wordt deze parameter ingesteld ✅ wanneer de regelaar wordt herkend door FlexiO. Hetzelfde ✅ voor Modbus RTU, als de juiste kabel rechtstreeks van de omvormer naar de FlexiObox.  Voorbeeld |
|
Check 3: Gekoppeld
Uit te voeren controle | Indien niet ok |
|---|---|
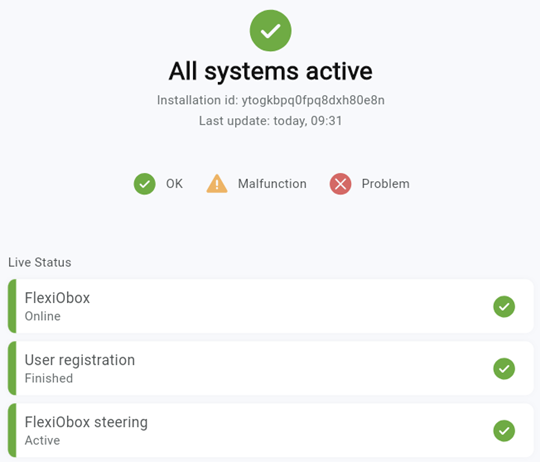
Geeft aan wanneer de FlexiOBox is gekoppeld aan een eindgebruiker en deze de registratie ook met succes heeft voltooid.  Voorbeeld |
|
Controle 4: Geconfigureerd
Uit te voeren controle | Indien niet ok |
|---|---|
Als er een configuratie is gemaakt, wordt deze parameter ingesteld op ✅ "thingName".  Voorbeeld |
|
Check 5: P1
Uit te voeren controle | Indien niet ok |
|---|---|
Als de P1-poort van de digitale meter is aangesloten, is deze parameter ✅ aanwezig wanneer FlexiO de metergegevens ontvangt. Dit geldt voor zowel bedrade als draadloze P1-verbindingen.  Voorbeeld |
|
Controle 6: Batterij (BMS)
Uit te voeren controle | Indien niet ok |
|---|---|
✅ wanneer er een verbinding is tussen de omvormer en het Batterij .  Voorbeeld |
|
Controle 7: EV
Uit te voeren controle | Indien niet ok |
|---|---|
✅ Als er een lader is geconfigureerd, herkent FlexiO automatisch de geselecteerde lader in het netwerk. 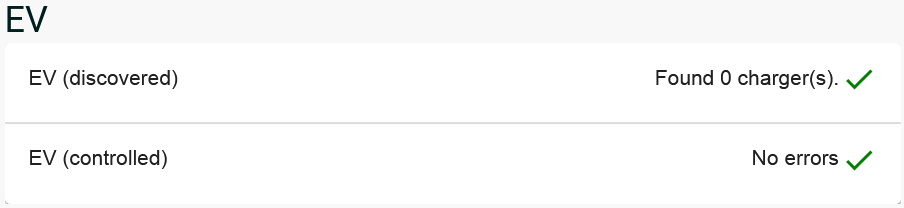 Voorbeeld (geen EV) |
|
Controle 8: Eastron
Uit te voeren controle | Indien niet ok |
|---|---|
✅ als een HomeWizard Eastron meter is ingesteld in de instellingen en FlexiO deze automatisch herkent (zoals verwacht).  Voorbeeld (niet geïnstalleerd) |
|
Controles afronden
Alle tabbladen op de pagina Apparaatinfo moeten worden ingevuld. Als er zich een probleem voordoet, je kan de details vinden op hetzelfde tabblad met een link naar de documentatie.
Als de bovenstaande diagnoses niet worden opgelost (niet gecontroleerd ✅ ), raadpleeg dan de installatie- en trainingsdocumentatie op ons platform of neem contact op met onze technische helpdesk.
Volgende sectie: FlexiO activeren
Als alle diagnostische fouten zijn opgelost, je kan doorgaan naar de laatste stap. 4. FlexiO activeren